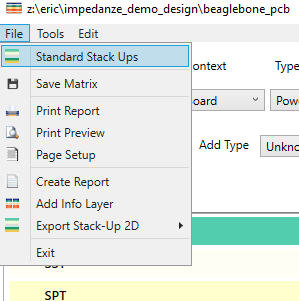
To change e.g. the order of layers, you have to open the "Layer Matrix" menu, which can either be directly accessed through right-clicking in the layer panel and selecting "Open Matrix" or selecting "Fabrication » Matrix" in the main menu. There you are able to i.a. add new layers, load predefined standard stack ups, and even print a report of your stack up or export it as CSV.
In addition to the order of the individual layers every other information like default stackup, layer type, hights, layer attributes, material, colour, etc. can also be adjusted to fully fit your needs. Once every configuration is in order the printed curcuit board can thoroughly be inspected by selecting one or more layers (by simply clicking on them) for visual representation. By default, each layer is assigned a specific colour so that it can quickly be identified which parts and layers are belonging together. Related colours and layers can be found between the checkbox and the layer name. Should the colours not meet your preferences, they can also be adjusted either seperately through right-clicking on the concerning layer and selecting "Set Color of Layer" or globally through "Start » Setup Colours".
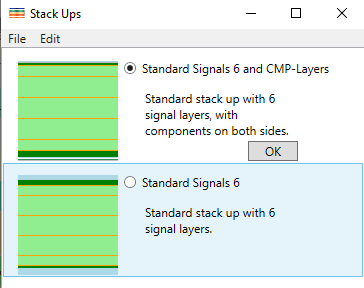
For example, you can choose a standard stackup for your pcb. To do so, right-click on "File" in the upper left corner of the menu. There, you have the option to choose one of the default stackups.