Symbols / Objects are stored in the symbol library. You can either access it when e.g. adding or editing objects or you can directly open the symbol library.
By clicking on the tab “Symbol Library” which can be found under the ribbon “Fabrication”, the following window will open.
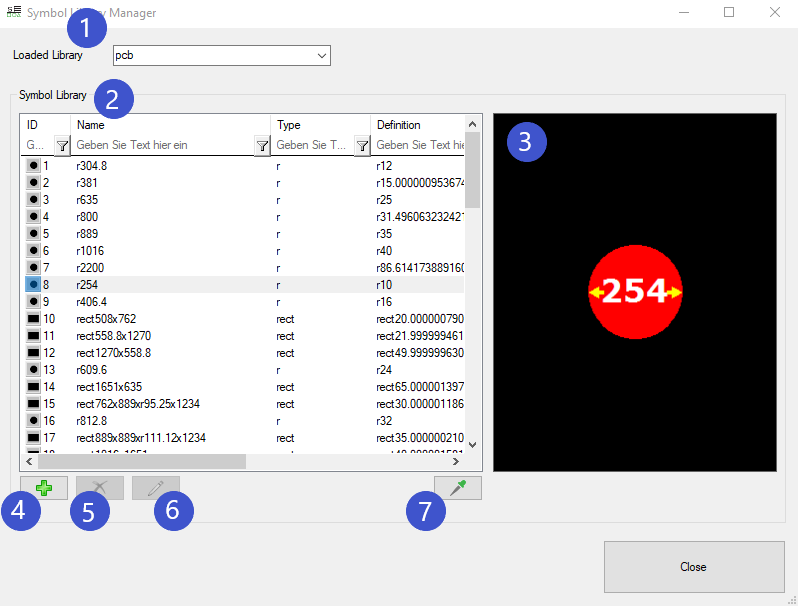
1. Under “Loaded Library”, you have three different types of libraries to choose from:
To get access to the symbols of one of these symbols, you have to open the subcategories of the corresponding library.
2. Then, you will see a list with all symbols and their properties stored in this library.
3. Selecting one of these symbols in the list, will visualize them on the right side of the list.
4. Clicking on the green plus at the bottom left corner of the dialog will open the following dialog:
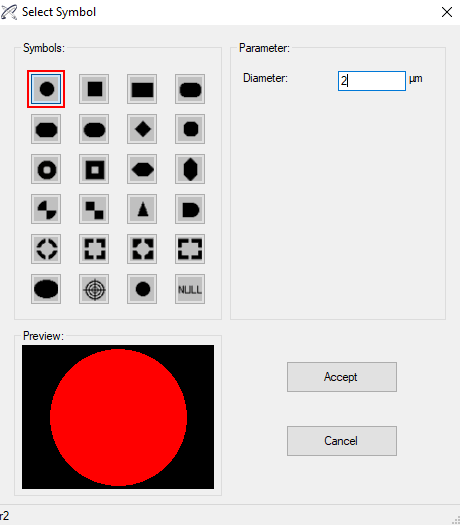
Here, you have the choice between different ODB++ symbols that can be adjusted according to your needs by defining their parameters. Clicking on “Accept” will then add the newly defined symbol to the currently opened Library.
5. Clicking the “X” when you have selected a list item, allows you to extinguish this symbol in your library.
6. Clicking on the pen symbol will open up the “Symbol Property Editor”.
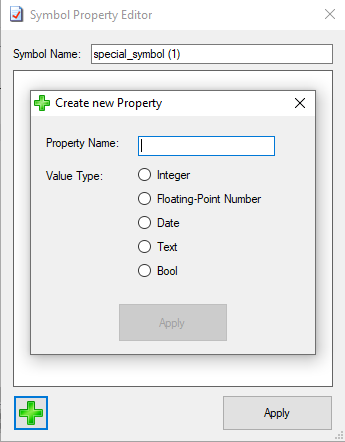
The Symbol Property Editor allows you to change the name of the symbol and create a new property by entering a new property name and by choosing a new value type for the symbol.
You can´t delete or edit the properties of a symbol that is a regular feature of your design. When you have selected one of these symbols, the two buttons will be greyed out.
7. If you have selected the currently opened Job as a Library, you have the option to pick any of the symbols on your design in the graphic interface and the corresponding symbol in the list will be highlighted.
There are two more options when you have selected an XML or 365 Library to work with. The dialog for these libraries will also look a bit different:
When choosing either an XML or PCB-I 365 library, you can click on ![]() to open another dialog for adjusting the settings of the library.
to open another dialog for adjusting the settings of the library.
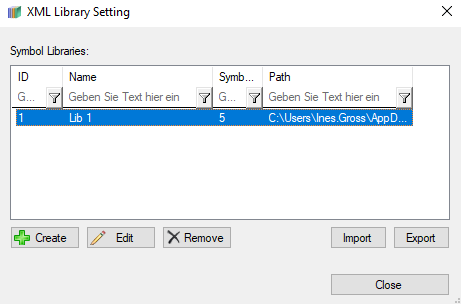
This editor allows you to create, edit, remove, import and export a (new) library. When adding a new library (click on “Create”), you have to enter a new name for the library and you have to select the propriate path for the library file you want to choose.
If you want to remove a symbol library in the setting dialog by selecting it and clicking on “Remove”.
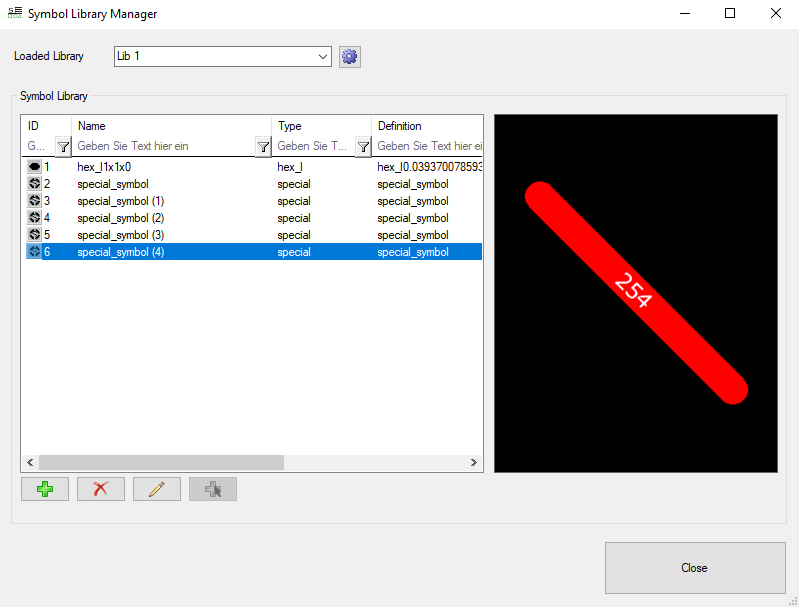
You can also edit the parameters of an already existing object or add a new symbol from the current selection. Clicking on ![]() or double-clicking on a symbol in the list will open a new window of PCB-Investigator allowing you to adjust the currently selected symbol in the list to gain a special symbol that’s not contained in any of the libraries.
or double-clicking on a symbol in the list will open a new window of PCB-Investigator allowing you to adjust the currently selected symbol in the list to gain a special symbol that’s not contained in any of the libraries.
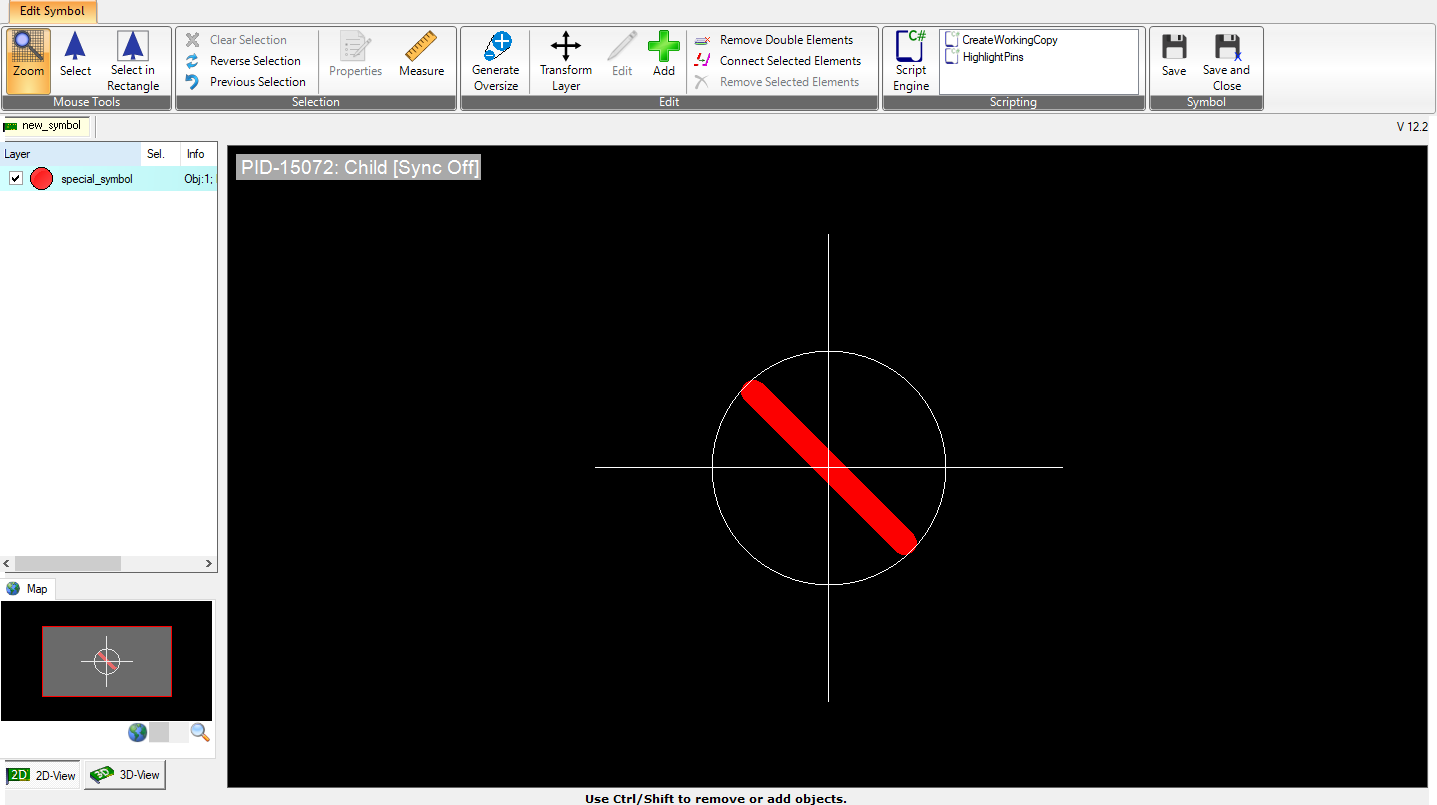
To configure this symbol, you can then click on “Add”. This allows you to compile a special symbol. How to add symbols or objects is described under “Add Objects”. If you have completed the compilation of your special symbol, you can click on “Save” or “Save and Close” on the upper right corner of the window and you will get back to the main Symbol Library dialog.